Try This At-Home Ankle Sprain Treatment
Ankle sprains are bad enough on their own, but what’s worse is the likelihood of getting hurt again later on. Once you get that first sprain, you could enter a frustrating cycle of injuring and reinjuring that ankle. Here’s how to break that cycle and heal from your ankle sprain for good, right now.
When you sprain your ankle, you injure ligaments and tendons on either side of your ankle that work to keep it strong and stable. Ankle sprains often become a recurring pattern due to elongated and loose ligaments. When that happens, the muscles surrounding the ankle can’t optimally function because they’re injured, inhibited due to swelling, or short and stiff. To break the cycle, you need to restore 100 percent muscle pump function.
At the TB12™ Sports Therapy Center, we treat ankle sprains with hands-on muscle pliability work. You can make progress, too, with at-home pliability.
FIND THE RIGHT MUSCLES
There are a few muscle groups around your ankle that provide stability and muscle function. Here’s how you can target them with assisted devices — the TB12™ Vibrating Sphere or Vibrating Roller.
The anterior tibialis is a long, slender muscle located in the front of your lower leg. It travels from the outside of the knee down to the top of the ankle and foot. To feel this muscle from a seated position, touch the outside of your lower leg and do a few toe raises to feel the muscle mass tighten.
The peroneals are a group of three muscles located on the outside of your lower leg, over your fibula, that run down behind your ankle. To feel your peroneals, touch the outside of your lower leg and move your foot in and out. As you point your foot outwards, you’ll feel your peroneals contract under your fingers.
PLIABILITY
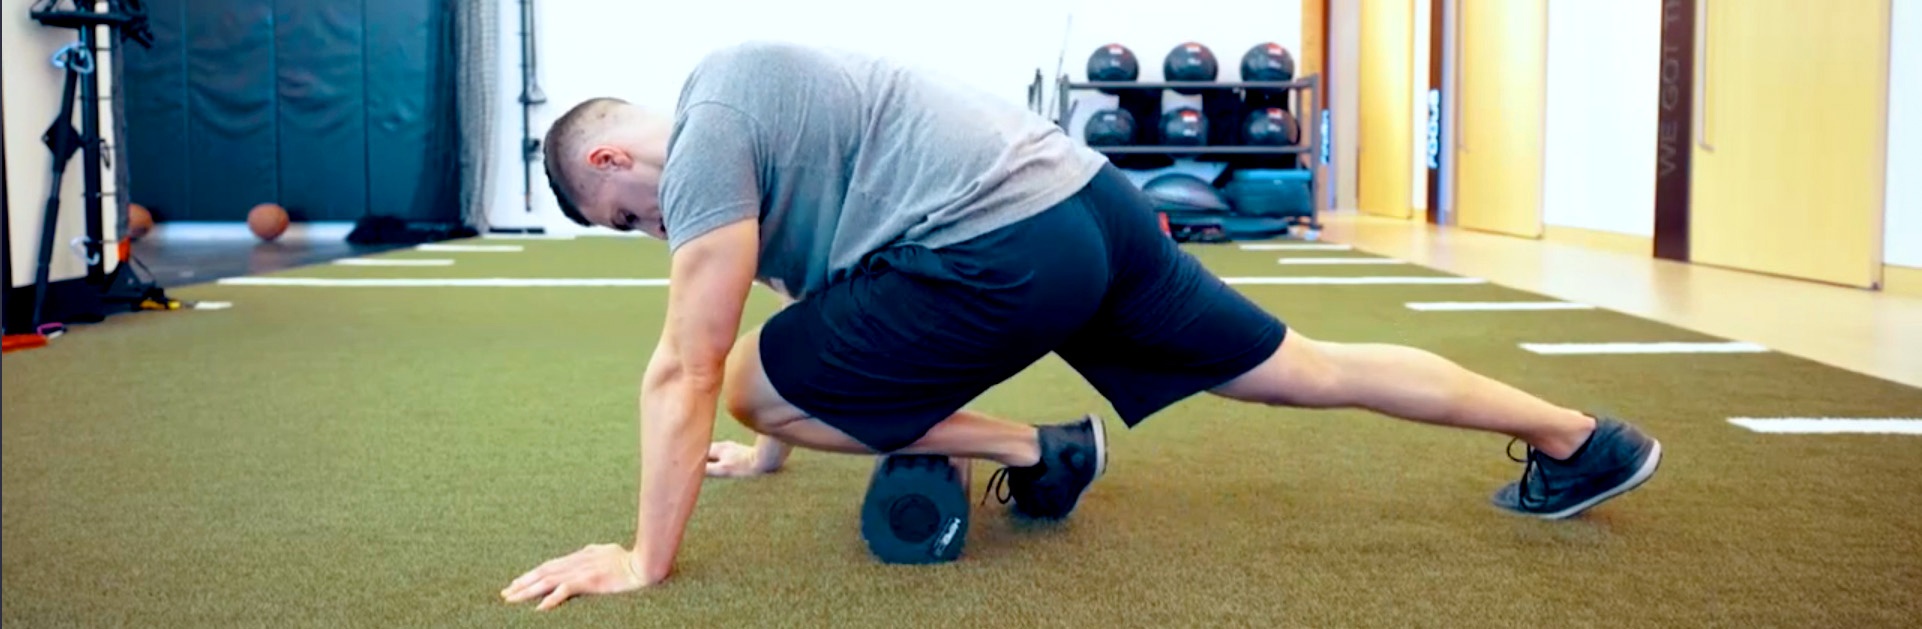
To target these muscles, turn the device on and get into a crouched position on the floor with straight arms and both hands in front of you. Position the outside of the ankle you’re targeting on the device, just above the thick ankle bone, with the other foot on the floor, ready to propel you.
Begin rolling back and forth on the outside of your shin, all the way up to just below your knee, and back down to your ankle. Be careful to avoid rolling over the part of your tibia that is just bone and no muscle mass, as this will be very painful.
ACTIVATE THE MUSCLE
To make sustainable changes to the tissue, you’ll need to activate this muscle. As the assisted device slides up the shin toward the knee, point your toes away from your body. Then point your toes back toward your body as you return the device to the ankle. This should be done as quickly and smoothly as possible for 10-15 seconds.
GO TO THE NEXT MUSCLE GROUP
Next, you’ll target the posterior tibialis muscle group on the inside of your tibia. To understand where these muscles are, run your fingers along the inside of your shin. As you move your foot in and out, you should be able to feel these muscles contract and relax under your fingers.
USE THE ROLLER
Sitting on the floor, place the inside of the lower leg you’re targeting on the device, with the other leg to the side and both arms behind you. Starting at the bottom of your ankle, roll back and forth along the inside portion of your tibia to just below your knee. Again, you’ll activate this muscle. As the roller slides up the inside of your shin to your knee, point your toes up towards you. As you return the roller to your ankle, point your toes away from you. Repeat this as quickly and smoothly as possible for 10-15 seconds.
CALF MUSCLES
The final muscles you’ll target are the calf muscles. To feel your calf muscles on the back of your lower legs, simply perform some heel raises.
Sit on the floor and place the back of the lower leg with the ankle sprain on the device. Your other leg should be slightly aloft, and keep both arms behind you. Starting at the Achilles tendon, roll the device all the way up past the knee, using your hands to guide your body. If you want to increase the intensity of the movement, place your opposite leg on top of your injured ankle.
WIGGLE YOUR TOES
You will move your toes during this at-home pliability work, too. Start with your toes pointing away from your body. As you roll the device up to the back of your knee, point your toes toward your body as far as they can go. Repeat this motion for 10-15 seconds.
LEARN MORE
As with any treatment method, please consult with your health care provider before starting. For more info about the TB12 Method and how it can help you feel strong, healthy, and capable, download the TB12 Method mobile app and check out The TB12 Method: How To Achieve A Lifetime of Sustained Peak Performance.
We want to hear more from you all! Feel free to reach out to us on social media @TB12Sports and our Peak Performer Forum on Facebook with other videos you’d like to see us create. We look forward to helping you achieve your version of sustained peak performance.